LIME CRIME LIPSTICK
Lime Crime lipstick comes in an amazing range of vibrant, kick-ass colours and textures in adorable packaging that is 100% cruelty-free. Choose from metallic, velvetine, and Diamond Crushers to create the effect of crushed diamonds on your lips and more. We've grabbed some of our favourite shades and finishes for you to try!
Like us here at Beserk, Lime Crime is passionate about being cruelty-free! All Lime Crime cosmetics are PETA verified vegan and Leaping Bunny certified cruelty-free. Leaping Bunny suppliers also certify that no animal testing is used to produce their supplies. The Lime Crime brand reflects the founder’s values and her desire to make the world a brighter place!
UNICORN HAIR COLOUR
DIY HAIR COLOUR AT HOME
Feelin’ stuck in a rut? Babe, you’ve gotta switch it up! Now more than ever, it’s super important to treat yourself to some tender loving self-care. One way to celebrate your badass self is with a hair colour makeover. Changing your strands can stir up creativity, boost your confidence, and unleash some pent-up stress using minimal effort.
Now’s the time to try a new shade and turn up your transformation with that bold colour you’ve been eyeing! Think you got what it takes to change up your hair colour at home? We think you do, too! But hold up—dyeing your hair by yourself can be confusing, sometimes even a little terrifying... especially if you’ve never dyed your own hair before, right? WRONG.
We’ve got you covered for a successful DIY dyeing session! Save the trip to a hair stylist. Let’s get into step-by-step tips and tricks for how to dye hair at home. Don’t worry, you’ll be unveiling your edgy new hue via TikTok and IG in no time!
Step 1. Pick a dye that matches your lifestyle
While there are various dye colours to choose from, first decide on the type of formula you want. Keep in mind the amount of time and effort you’re willing to put into maintaining your colour. Also think about how fast your hair grows—the faster it grows, the more touch-ups you’ll need.
Other factors to keep in mind before purchasing dye include your current hair colour and texture. For instance, very dark hair will need to be chemically lightened prior to hair dyeing because darker hair has a less-intense colour payoff compared to lighter hair. If you have deep brunette hair and want to try a new courageous shade, we suggest starting with already pre-lightened or bleached hair.
Semi-permanent hair dye vs. Temporary hair colour:
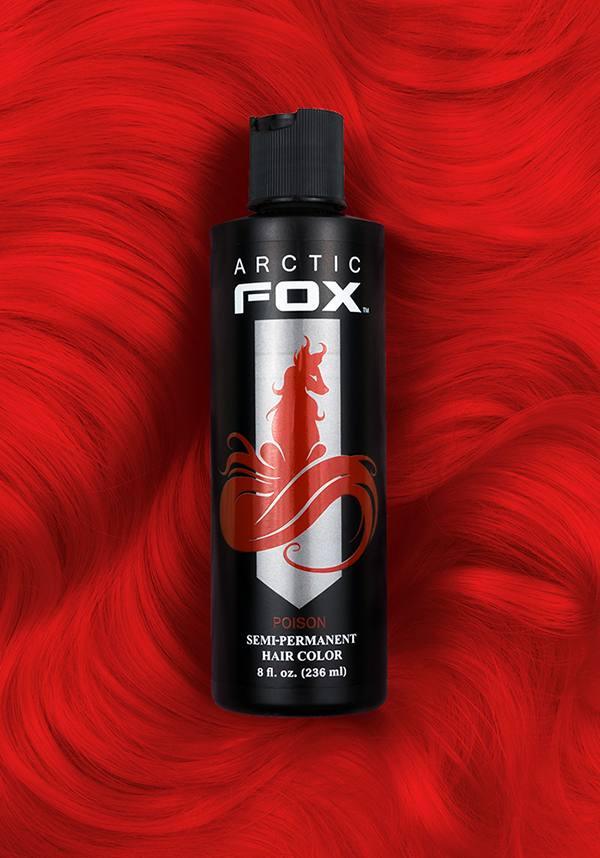
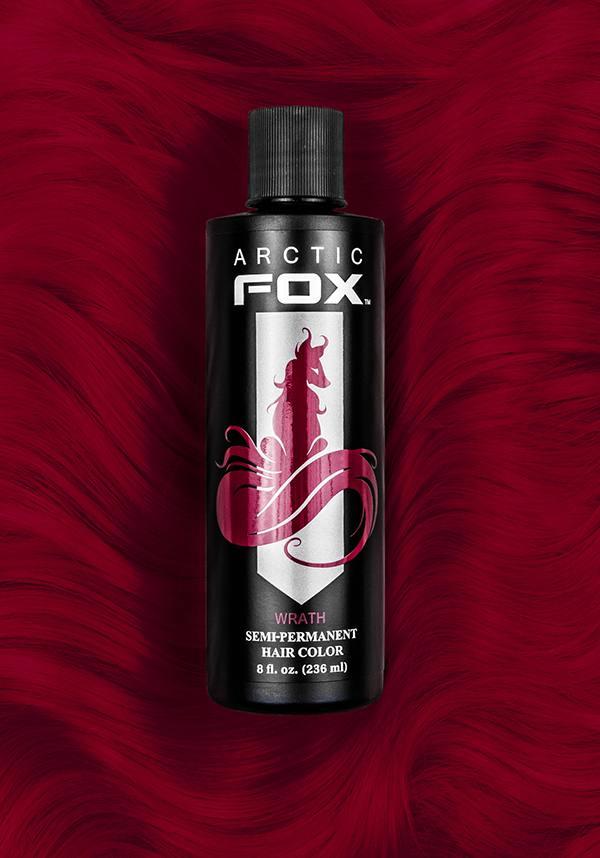
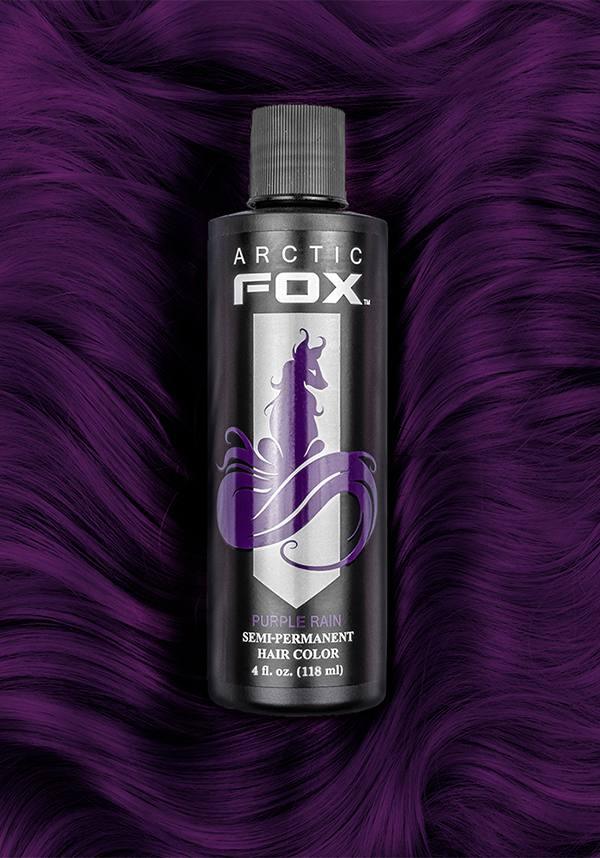
Semi-permanent hair dye: Unlike permanent hair dye, semi-permanent hair dye, including those in our Unicorn Hair Dye Collection, don’t contain ingredients that chemically trap pigments below the cuticle. Instead, this type of at home home hair dye adds pigments inside the outer hair cuticle that will gradually wash out over time.
Strands that have a more opened-up hair cuticle, like pre-lightened hair strands, make it easier for colour to sit in the hair’s cuticle. (That’s why it’s essential to have pre-lightened locks before using this type of dye!) Our Unicorn Hair Collection includes two semi-permanent dyes that come in two finishes: Full Coverage has a range of bold and bright colours, and hair tints include pastels and more muted shades.
Temporary hair color: Like temporary tattoos, sometimes you just need on-the-fly colour to mix things up. If you’re a blue today, pink tomorrow type of person, you should try temporary hair colours. This dye, which can also come in spray form, covers the outside of the hair shaft and will typically wash out after one shampoo rinse. LC TIP: This is kind of a no-brainer but do consult the dye’s packaging before you buy it to see how the colour will look on different hair shades. Most hair dye brands should have a comparison chart.
If you’re just not into dyes, you can still get a temporary colour fix using our Unicorn Hair Rainbow Mist colour spray or Unicorn Hair Star Mist glitter spray. Rainbow Mist leaves a sheen of colour and Star Mist adds sparkly pearly pigments to your hair—each temporary hair colour spray washes out in one rinse. If you want easy-peasy, these temporary options are your main squeezy.
Step 2. Put some pep in that prep!
Tools you’ll need (other than your hair dye!):
-Protective gloves
-Applicator brush
-Hair clips (at least 4)
-Bowl for dye
-Hair dye cape or a shirt you don’t mind getting messy
-Stuff to cover your workstation, like paper towels or newspaper
-Surface cleaner
You got the goods? Good! Now it’s time to get your area ready for some serious colour.
Prep Your Station
Dyes can be messy and stain stuff! To prevent your entire bathroom from looking like a modern art piece, we recommend you put away anything nearby that’s made of fabric and can potentially be stained. This includes bath towels, bathmats, cute headbands, etc.
Dye may accidentally sprinkle on and stay there. Better to be safe than have unintentionally multicoloured towels! Though, we do recommend you have a designated hair dyeing towel. (Avoid using mum’s nice ones!) Next, line your area with either paper towels or newspaper—sort of what you would do if you were painting, because technically you are! LC TIP: Keep a surface cleaner on-hand in case the dye decides to drop right on your white ivory sink. Usually dye may be removed with rubbing alcohol, too!
While you dye, wear a comfy shirt you don’t mind getting messed up. For no-fuss, salon-like coverage, you can also buy a hair dye cape.
Prep Your Hair
For all dyes, including our Unicorn Hair Collection, we highly recommend you do a strand test at least 48 hours before your dyeing session. A strand test shows how the colour will actually look on your hair. It may also help uncover any surprise allergic reactions you definitely want to avoid. LC TIP: Make sure your hair is clean, unconditioned, and dry. While wearing protective gloves and clothing, add dye to a 1-inch strand of hair that’s in a less-visible area (try 2 inches above the ear, toward the back). Leave dye in for the recommended amount of time, then rinse. If you’re not happy with the results, try to alter the colour with a conditioner or mix colours together to nail your desired hue! Our Unicorn Hair colour mixer in Dilute will lighten semi-permanent shades and our colour mixer On Mute will make them instantly smokey.
Then, brush out your hair and get rid of any knots. This will help you colour your hair more evenly.
Before you start full-fledge dyeing, split your dry and unwashed hair into 4 even sections (left and right sections, 2 in the front and 2 in the back), securing each with hair clips.
Step 3. Dye that hair like you’ve never dyed before!
You’ve closely read your dye packaging instructions and now it’s time to put those protective gloves and cape on! YOU SUPERHERO, YOU!
Work dye into 1-inch wide strands so you don’t miss a hair. Apply colour evenly from root to end with the applicator brush. Massage each strand with fingers, to ensure even distribution of colour. To get the most saturated pigments, it’s important you leave the colour on for as long as directed. That way, the dye can develop effectively. LC TIP: Colour absorbs faster in finer hair compared to thicker hair. If you’re using our Unicorn Hair Full Coverage semi-permanent dyes, leave it in for longer, around 1 to 2 hours, for more intense and lasting colour.
If your skin gets stained, wipe away traces of the colour ASAP. When it’s time to rinse off, run your hair under lukewarm water until hair feels clean and rinses clear. If you’re using semi-permanent dye, do not use conditioner or shampoo while rinsing. If you’re using temporary dye, don’t wash your hair unless you’re ready to go back to your natural hair colour.
Step 4. Take care of your strands
When you commit to dyeing your hair, maintenance is everything! Be sure to use special colour shampoos and conditioners made specifically for your hair shade since these contain ingredients that retain your colour for much, much longer. We recommend our hair colour conditioner, which saves fantasy hair between dyeing sessions with a perk of pigment!
Also, try to use sulfate-free shampoos and conditioners. Sulfates deep cleanse but also strips out natural oils from the scalp, leaving your hair more prone to becoming dry and brittle.
If you’re using semi-permanent dye, protect your colour by washing your hair less. Colour-safe dry shampoo can refresh your hair in a snap. LC TIP: Heat strips away colour. Prior to blowouts, use a heat protectant spray to maintain your colour!
Still scratching your head? Read our FAQs:
Should I use DIY hair dye? Well, we don’t recommend creating your own dye at home! That means don’t use markers, food colouring, etc. to make your own DIY dye recipe because you can seriously damage your hair. Instead, opt for DIY-friendly, pre-made dye you can find in stores.
If you use any of our Unicorn Hair semi-permanent dyes or temporary sprays, you are already well on your way to vibrant and damage-free hair! Our magical, gentle, deposit-only dye formula is vegetable glycerin-based and every ingredient is vegan. No ammonia, PPD, peroxide, or bleach. Our Unicorn Hair Conditioners also extend the life of your hair colour while giving strands a boost of sweet-smelling shine.
Do I need to bleach my hair before dyeing? That depends on the colour result you want and the starting point of your hair. The lighter your hair colour is to start, the more vibrant and truer to tone your result will be. Our Unicorn Hair Full Coverage formula contains a higher pigment load and delivers more saturated colour, so it delivers maximum colour impact on pre-bleached platinum to medium blonde hair and adds a tint of colour to dark blonde and light brown hair.
My hair is thick, dark, and/or curly! Can I still dye my hair using the instructions above? Yes, but you will still have to bleach your hair or pre-lighten it. Also, if you recently relaxed your hair, we don’t recommend bleaching your hair on top of that since more chemicals will take a serious toll on your strands. However, if you already lightened your hair, do use the instructions above—it’s the same for different hair textures!
Why should I stick to ammonia-free hair dye? Ammonia is a chemical that busts through your hair cuticle in order to deposit colour. It’s basically that person who crashes your party unannounced—but brings food and drinks. Avoid ammonia since it can damage and dry out your hair in the long run. Plus, it doesn’t smell pleasant.
What do I do if I hate the new color of my hair? Don’t stress, don’t stress, don’t stress! There are some easy fixes you can try for damage control:
If you have really dark hair, Refinery 29 recommends using a clarifying shampoo several times after your dyeing session, since it will help fade the colour little by little. If your hair is too light, Refinery 29 also recommends deep conditioning by sleeping with a color treatment mask for a week, then following up with a toner or gloss that deposits the colour you’re wanting.
If the colour looks too brassy on your hair—as in, you’re getting some warm tones showing up in your color, Cosmopolitan recommends using cooler-toned, dark-blue and indigo shampoos in your next few washes.
Do You and Dye Your Hair at Home!
The best way to master dyeing hair at home? Have fun with it! Switching your hair colour can feel liberating and at the very least, it’ll be your next convo-starter. If you want a daring colour, do it! If you want to stick to a more natural tone, that’s fine, too. As a wise sage once said: You do you! Ready to dye your own hair? Browse our collection of vibrant semi-permanent color dyes! Whether you want grey hair or blue hair dye, we've got you covered.
BLEACHING BASICS FOR BEGINNERS
Eager to let your inner magic shine with some vibrant hair dye? Unless you’re already platinum blond, starting with bleach to lighten your base is a must. If you’ve lived with virgin hair (a.k.a. unbleached, uncolored, and unprocessed) your whole life, the concept of bleaching might be totally new to you. It might even be a little intimidating—but don’t let the unknown stop you from rocking a new look.
What does bleach actually do?
Bleaching hair strips its natural colour to leave you with a lighter shade. How does this work? It happens through a process called oxidation. Bleach opens the cuticle, which is the protective outer layer of the hair shaft, so it can with the melanin within. Melanin is the pigment responsible for your natural hair (and skin) colour. The chemical reaction oxidizes melanin molecules, leaving them colourless.
As you might have noticed, bleached hair isn’t completely white or see-through—it generally lightens to a pale yellow when enough product is used. That’s because keratin, the structural protein in hair, is naturally light yellow.
What results can I expect based on my hair colour?
When you’re bleaching hair at home, follow the instructions carefully to achieve your desired look and manage your expectations. What becomes of your locks after bleaching depends on their original colour, the product itself, and how long you leave it in.
First, consider your natural pigment. For dyeing purposes, hair colours vary from level 1 (black) to 10 (platinum). Levels 1–5, or black to brown, will need more dye to lift their pigment to a higher/lighter level. We recommend our 40 Volume Bleach Party for this level of lightening. If your pigment is level 6–9, or light brown to light blonde, the 20 Volume Bleach Party kit will give you the perfect base for vibrant color. Bleaching is not recommended for platinum hair—strands that have already been bleached might not have enough structural stability to withstand another round.
How to prepare your hair
Bleaching can leave your hair dry, brittle, and susceptible to breakage. With some prep and TLC, you can minimize the risk of major damage. At least two weeks before you bleach, start using our Hydrating Hair Mask. This deep conditioning mask ensures hair is healthy and frizz-free before treatment. Your lustrous locks will thank you!
In this time, you should also avoid heat styling and chemical treatments. This can leave hair weakened before bleaching when you want your strands as strong as possible.
Should I wash my hair before bleaching it?
Some say that it’s better to bleach clean, but you want your hair’s natural oils to provide a protective layer for your scalp and strands. Skip the shampoo a day or two before bleaching.
Can I bleach wet hair?
Leaving water in your hair reduces the lightening effects of bleach. Why? Water dilutes bleach, so the pigment won’t lift as much. Make sure your hair is totally dry for the best results.
How do I bleach my hair?
If you don’t already know how to bleach hair, our Bleach Party kit has all the detailed instructions and tips you’ll need for a successful session.
How can I protect my bleached hair?
Caring for your hair after bleaching and colouring is the key to maintaining healthy locks. Stock up on these nourishing, colour-protecting products before colouring your hair:
-Unicorn Hair Colour Shampoo: Keep your hair clean and soft post-treatment with our tinted, pH-balanced shampoo that won’t strip away your colour. This magical formula will enhance the vibrancy and longevity of your dye. Use the clear Universal product on bleached hair.
-Unicorn Hair Colour Conditioner: Our conditioner revitalizes and deepens colour, combats frizz, and adds shine to thirsty strands between dye sessions. The white Universal product is perfect after bleaching.
-Revitalizing Hair Oil: Packed with prickly pear oil, goji berry extract, and meadowfoam seed oil, this hair therapy product will nourish your locks with much-needed nutrients for health, shine, and vibrancy.
-Hydrating Hair Mask: Not only is our hair mask great for pre-bleaching, but it’s also one of the best ways to treat your hair post-dyeing. It restores hydration while supporting deeper, long-lasting colour.
How long should I wait before dyeing?
Your locks will be a little sensitive after bleaching, so give them a rest! We’re talking at least three days. If your hair is dry and frizzy, adding colour will only damage it further. Watch out for split ends, tough knots, and harsh, coarse strands.
Once the softness and shine start to return, and you can easily detangle it, that’s the green light you need to get colouring. You’ll need our mixing bowl & brush kit and no-slip clips for easy, at-home colour application. Embrace your inner unicorn and let your colours shine through!
GOODBYE TO GREYS: WHAT YOU NEED TO KNOW ABOUT DYEING OVER GREY HAIR
When your hair goes grey, it can seem like the perfect time to add some colour to your life. Even though grey hair has lost its natural pigment, it doesn’t create the blank slate you might be expecting. The process of hair going grey is two-fold. First, cells in the hair follicles stop producing melanin in the hair follicles themselves. Second, hair typically produces hydrogen peroxide that is then converted into hydrogen and oxide. However, as our hair ages, it loses the ability to do the conversion, which means that hair produces hydrogen peroxide that can naturally bleach added colours. So, how do you create the necessary canvas to add colour to your greys and maintain the look? We have some steps to help make your monochrome world go full colour.
Step 1. Prep Your Hair for Perfection
Healthy hair is the best kind to colour. As hair ages, it tends to lose its protective barrier, which can make it coarser and more prone to breakage. To protect your strands, make sure you condition and prepare before applying any dyes. Use a deep conditioner about a week before you plan to colour your hair, and make sure it stays well-moisturized. Our Hydrating Hair Mask is a great pick for a deeply moisturizing treatment before and after colouring.
Additionally, your water could be damaging your hair. Hard water strips the natural oils from hair and can make strands brittle and less penetrable. Add a filter to your shower head to ensure you're getting the best clean with the least amount of damage.
Step 2. Choose Your Color Permanence Wisely
The amount of grey you have will change what kind of dye you should use. If you have minor greying, temporary hair colour can be enough—and it can be a fun way to spice up your appearance in the short term. If your natural hair colour is lighter, the greys may be less detectable, even without dyeing over them.
If your hair has noticeable streaks or is mostly grey, you will likely need to use a semi-permanent dye for effective coverage. Our Unicorn Hair Full Coverage dyes provide a beautiful dose of colour and conditioning ingredients for softness and shine.
While permanent hair dye is also an option, the developing ingredients can be much harsher on hair that’s already prone to brittleness and breakage.
Step 3. Part Ways With Your Greys
The secret to covering greys effectively is in the application process itself. Because hair tends to be greyer at the roots, where it is growing in, you need to pay extra attention as you get closer to the scalp.
Use a fine-tooth comb or the end of a rat-tail application comb to make precise parts, and use hair clips to secure each section. Our mixing bowl and brush kit includes a handy multi-use tool that helps you draw clean parts, detangle, and apply your colour evenly.
Step 4. Hair Care Goes a Long Way
Preparing your hair was only the first step—you have to take care of it after dyeing, too. Our Unicorn Hair Colour Shampoo and Unicorn Hair Colour Conditioner are designed to keep your hair hydrated and clean and deposit pigments that boost color and shine. Choose the shade that coordinates with your new hue, or choose our colourless Universal formula for gorgeous, glossy locks every time.
Greys don’t stand a chance against a well-thought-out dyeing routine. Whether your new shade is an elegant chestnut, romantic red, or full-on fantasy fuchsia, you’re ready to transform your look.

















 FAST DELIVERY - ORDER BEFORE 2PM FOR SAME DAY DISPATCH
 30 DAY RETURN GUARANTEE


![Paradise Makeup AQ [Violet] | FACE & BODY PAINT [DAMAGED]**](http://www.beserk.com.au/cdn/shop/files/mehron-makeup-paradise-makeup-aq-violet-face-_-body-paint-1_325x525.jpg?v=1727207414)
![Paradise Makeup AQ [Violet] | FACE & BODY PAINT [DAMAGED]**](http://www.beserk.com.au/cdn/shop/files/Media_3_eec1693d-8b1e-4b55-a7de-8794e3a9d154_325x525.jpg?v=1744687837)
![Mystic Heather | AMPLIFIED COLOUR [DAMAGED]**](http://www.beserk.com.au/cdn/shop/files/mystic-heather-or-amplified-colour-beserk-all-clickfrenzy15-2023-cosmetics-cpgstinc-discountapp-dye-ebaymp-fp-hair-colour-hair-dye-hair-purple-labelvegan-manic-panic-manic-panic-hair_325x525.jpg?v=1687776633)
![Mystic Heather | AMPLIFIED COLOUR [DAMAGED]**](http://www.beserk.com.au/cdn/shop/files/Media_2_325x525.jpg?v=1744687328)

![Night Yume | NAIL POLISH [FAULTY]**](http://www.beserk.com.au/cdn/shop/files/neko-nail-cult-night-yume-nail-polish-1_325x525.jpg?v=1693349669)
![Night Yume | NAIL POLISH [FAULTY]**](http://www.beserk.com.au/cdn/shop/files/neko-nail-cult-night-yume-nail-polish-2_325x525.jpg?v=1693349669)
![Illusion | NAIL POLISH [FAULTY]**](http://www.beserk.com.au/cdn/shop/files/neko-nail-cult-illusion-nail-polish-1_325x525.jpg?v=1693349458)
![Illusion | NAIL POLISH [FAULTY]**](http://www.beserk.com.au/cdn/shop/files/neko-nail-cult-illusion-nail-polish-2_325x525.jpg?v=1693349457)
![Dancing | LED LIGHT [MISSING USB-C]**](http://www.beserk.com.au/cdn/shop/files/homewares-dancing-led-light-3_be6a77d3-561e-4ed1-b2f8-b746d528cacb_325x525.jpg?v=1688981309)
![Dancing | LED LIGHT [MISSING USB-C]**](http://www.beserk.com.au/cdn/shop/files/homewares-dancing-led-light-4_efa54786-e9e9-4a3a-afee-2c5f88fe6f23_325x525.jpg?v=1688981309)
![Black Talking Board | ELECTRIC AROMA LAMP [FAULTY]**](http://www.beserk.com.au/cdn/shop/files/gothic-gifts-black-talking-board-electric-aroma-lamp-4_325x525.jpg?v=1688315297)
![Black Talking Board | ELECTRIC AROMA LAMP [FAULTY]**](http://www.beserk.com.au/cdn/shop/files/gothic-gifts-black-talking-board-electric-aroma-lamp-1_325x525.jpg?v=1688315297)
![Poe's Raven | CANDLESTICK [DAMAGED]**](http://www.beserk.com.au/cdn/shop/files/alchemy-gothic-poes-raven-candle-stick-5_325x525.jpg?v=1687760649)

![Coffin | BRUSH HOLDER [DAMAGED]**](http://www.beserk.com.au/cdn/shop/files/deadly-sins-cosmetics-coffin-brush-holder-1_325x525.jpg?v=1733074666)
![Coffin | BRUSH HOLDER [DAMAGED]**](http://www.beserk.com.au/cdn/shop/files/deadly-sins-cosmetics-coffin-brush-holder-3_325x525.jpg?v=1733074666)
![Virgin Pink | HAIR COLOUR [236ml] [DAMAGED]**](http://www.beserk.com.au/cdn/shop/files/virgin-pink-or-hair-colour-236ml-beserk-all-arctic-fox-artic-fox-clickfrenzy15-2023-colour-pink-cosmetics-discountapp-fp-hair-colour-hair-dye-hair-pink-hair-products-labelvegan-lethal_325x525.jpg?v=1687776433)
![Virgin Pink | HAIR COLOUR [236ml] - Beserk - all, arctic fox, artic fox, clickfrenzy15-2023, colour:pink, cosmetics, discountapp, fp, hair colour, hair dye, hair pink, hair products, labelvegan, lethal industries, pink, vegan](http://www.beserk.com.au/cdn/shop/files/virgin-pink-or-hair-colour-236ml-beserk-all-arctic-fox-artic-fox-clickfrenzy15-2023-colour-pink-cosmetics-discountapp-fp-hair-colour-hair-dye-hair-pink-hair-products-labelvegan-lethal_16e2f978-0c8e-4e8c-bb41-57217f9b3d70_325x525.jpg?v=1687776435)


![Squishmallows | MULTI COLOUR PEN [BLIND PICK]](http://www.beserk.com.au/cdn/shop/files/squishmallows-multi-colour-pen-set-1_325x525.jpg?v=1736689624)
![Squishmallows | MULTI COLOUR PEN [BLIND PICK]](http://www.beserk.com.au/cdn/shop/files/squishmallows-multi-colour-pen-set-10_325x525.jpg?v=1736689624)


![Virgin Pink | HAIR COLOUR [236ml] - Beserk - all, arctic fox, artic fox, clickfrenzy15-2023, colour:pink, cosmetics, discountapp, fp, hair colour, hair dye, hair pink, hair products, labelvegan, lethal industries, pink, vegan](http://www.beserk.com.au/cdn/shop/files/virgin-pink-or-hair-colour-236ml-beserk-all-arctic-fox-artic-fox-clickfrenzy15-2023-colour-pink-cosmetics-discountapp-fp-hair-colour-hair-dye-hair-pink-hair-products-labelvegan-lethal_1600x.jpg?v=1687776433)
![Virgin Pink | HAIR COLOUR [236ml] - Beserk - all, arctic fox, artic fox, clickfrenzy15-2023, colour:pink, cosmetics, discountapp, fp, hair colour, hair dye, hair pink, hair products, labelvegan, lethal industries, pink, vegan](http://www.beserk.com.au/cdn/shop/files/virgin-pink-or-hair-colour-236ml-beserk-all-arctic-fox-artic-fox-clickfrenzy15-2023-colour-pink-cosmetics-discountapp-fp-hair-colour-hair-dye-hair-pink-hair-products-labelvegan-lethal_16e2f978-0c8e-4e8c-bb41-57217f9b3d70_1600x.jpg?v=1687776435)


